I had found myself longing for a little more creativity (outside of the photography and writing this blog offers) as the season of celebration and the anticipation of all that glistens draws near.
So back to Pinterest I went, and found myself a few new projects. One immediately appealed to my symmetrical-loving eye. Popsicle sticks, glue, paint, glitter, it doesn't get much easier than this!
So, without further ado, I give you:
The Giant Hanging Snowflake Experience
You'll need:
Popsicle (craft) sticks (one or two packs of 100 from the $2 shop)
Strong glue (u-hu or other glue suitable for wood)
White and red paint
Glitter (red and silver/clear)
Gemstones (for a little extra pizazz)
Red wool and fishing wire
Double sided foam tape (for hanging from the ceiling)
This tutorial makes six different snowflakes of varying sizes based on 3 different centres.
For the star-centred snowflakes:
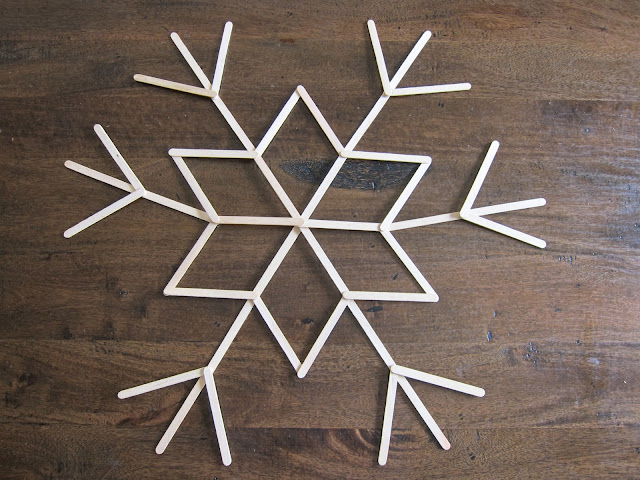
Start with six sticks (two on each side and glue together) to make an asterisk
Then add two sticks in a triangular shape to join up each of the asterisk edges
Snowflake 1
For the first shape, add another four sticks two long with two more coming out in a V-shape.
Snowflake 2
For the next shape, remove the long stick and create a W-shape with 3 sticks on each star point.
For the hexagon-centred flakes:
Snowflake 3
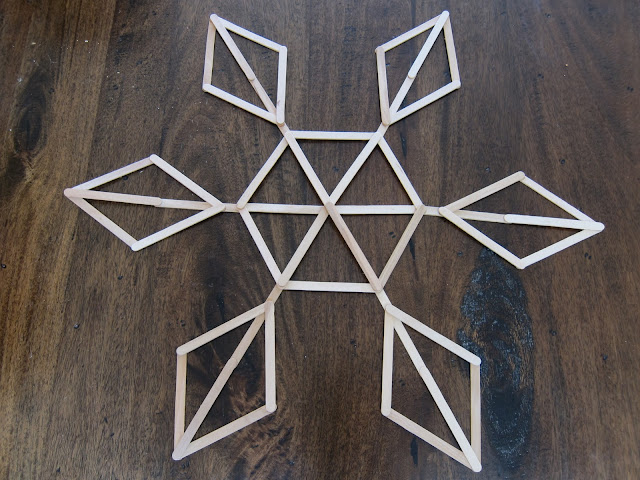
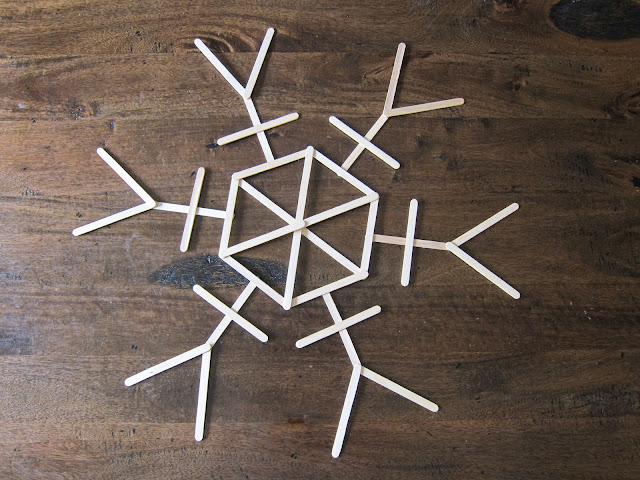
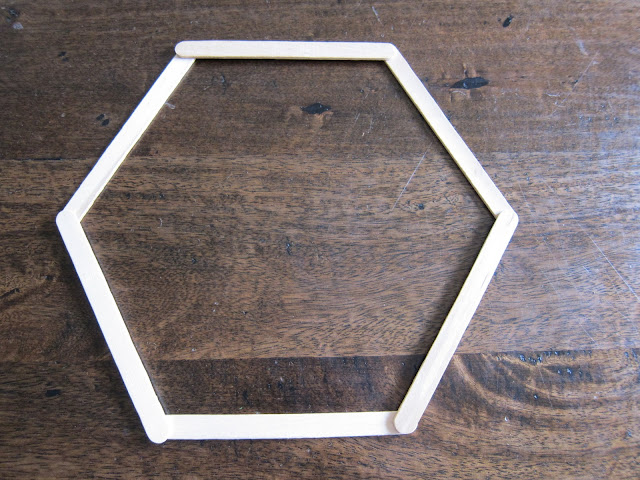
Start with the same initial asterisk shape of six sticks but then add six sticks around the outside to form a hexagon. From here you have 3 different shapes you can make.
Take another six sticks and make a longer stick by joining 2 sticks together, and then add a diamond shape on top of this with another four sticks. Attach to the main hexagon shape. Repeat for each of the six sides.
Snowflake 4
Start with the same hexagon but add four sticks shaped like a stick figure man to each side using the mid-point of each hexagon to join to the centre shape.
Snowflake 5
Use the same hexagon centre shape but instead of four sticks, just add on two sticks in a cross shape at the mid-point of each hexagon side.
Snowflake 6
Make a mini asterisk using only three sticks.
Make a separate hexagon shape.
Make a cross shape with two more sticks and join to mini asterisk. Lay hexagon shape on top.
Paint and Glitter
I painted three snowflakes red and three white (two coats for each snowflake). On the second coat of paint, I painted a small portion of the snowflake at a time and then sprinkled the glitter over the wet paint so it would stick. Although, I must admit, even now we still have a fair amount of glitter strewn through the carpet despite my best endeavours it really does get everywhere!
Once dry, hang up with red wool or clear fishing wire. Be warned, they are quite fragile though, I had to re-glue a few that I accidentally knocked when hanging up.
Finally, ooh and aah at how purty and Christmassy they make the place look. One can never start decorating for Christmas too early I say!
I'm interested to know too, which snowflake design appeals to you most?


8 comments :
Loving your blog! Your how to do it posts are awesome :)
I will def make some for my home this Christmas.
Just have to wait till after my little girls birthday <3
WOW, these are so cool!! My favourites are the top 2 and the one on the left below those. I'm going to keep an eye out for popsicle sticks now :)
Awesome!! I am yet to venture to pinterest... because of the distraction I'm sure it would cause... but that is a fabulous activity! I think I will try and give it a go with my kids!
You clever girl!
LOVE these! Thanks for sharing
These are lovely, and so Christmassy, yey!
I like Snowflakes 1 and 2 best.
beautiful :) i like the first one best
Very cool Meg - will llook forward to making these with the kids soon xox
Stunning! I still haven't ventured onto pinterest, but thank you for sharing your wonderful discovery there!
Post a Comment